 Skip to content


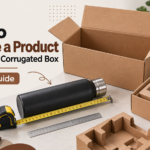






Choosing the right corrugated box starts with accurate product measurements. A box that is too small may not leave enough room for protective materials, while an oversized box can create unnecessary empty space and allow the product to move during shipping.
The goal is not simply to find a box that fits. You need enough internal space for the product, inserts or cushioning, and any additional items included in the package.
This guide explains how to measure a product for a custom corrugated box, understand box dimensions, plan space for protective materials, and avoid common sizing mistakes.
Why Accurate Product Measurements Matter
Accurate measurements help create packaging that fits the product instead of forcing the product into a standard box size.
The right fit can help:
- Reduce unnecessary empty space
- Limit product movement
- Make protective materials easier to plan
- Create a cleaner presentation
- Avoid boxes that are unnecessarily large
- Improve packing consistency
This is especially important when packaging fragile, heavy, irregularly shaped, or multi-piece products.
Before choosing the box style, flute, board grade, or printing, start by understanding exactly how much internal space the product requires.
Understand Length, Width, and Height
Corrugated box dimensions are generally expressed as:
Length × Width × Height (L × W × H)
Understanding these measurements helps avoid confusion when communicating box requirements.
Length
Length is normally the longest side of the box opening.
Width
Width is the shorter side of the box opening.
Height
Height is the distance from the bottom of the box to the top.
For example, a box listed as:
12 × 8 × 6 inches
would have a length of 12 inches, width of 8 inches, and height of 6 inches.
Always confirm how a packaging supplier defines and lists dimensions before approving production.
Step 1: Measure the Product Itself
Start with the actual product rather than an existing box.
Place the product on a flat surface and measure its:
- Length
- Width
- Height
Use the widest or tallest points when the product is not perfectly rectangular.
For example, if a bottle has a narrow body but a wider pump or cap, measure the widest part rather than only measuring the bottle body.
Do not round measurements down. Small differences can affect the final fit, especially when the box contains inserts or closely fitted components.
Step 2: Consider the Product’s Shape
Not every product fits neatly into a rectangular measurement.
Irregular products may have:
- Handles
- Pumps
- Curved surfaces
- Protruding parts
- Cables
- Accessories
- Uneven edges
Measure the maximum length, width, and height across all parts of the product.
For very unusual shapes, measurements alone may not provide enough information. Product photographs, drawings, CAD files, or physical samples can help a packaging supplier understand the shape and determine how it should sit inside the box.
Step 3: Decide How the Product Will Sit Inside the Box
Product orientation can change the required box dimensions.
For example, a bottle might be packaged upright or placed horizontally. An electronic device may sit flat with its accessories beside it, while a gift set may display several items in individual compartments.
Before determining the final box size, decide:
- Which direction the product will face
- Whether it will lie flat or stand upright
- Where accessories will be placed
- Whether multiple products will be stacked
- How the customer should see the product when opening the box
Planning the layout first can prevent unnecessary space later.
Step 4: Add Space for Protective Packaging
The product dimensions are not always the same as the required internal box dimensions.
Fragile products may need protective materials such as:
- Corrugated inserts
- Paper cushioning
- Foam
- Dividers
- Protective pads
- Other fitted packaging components
If cushioning surrounds the product, its thickness needs to be included when determining the internal box size.
For example, if a fragile item measures 10 inches long, the box may require additional space on both ends for protection.
Do not simply add a random amount of extra space. The required allowance depends on the product’s fragility, weight, shipping method, and protective packaging design.
Step 5: Measure the Product With Its Insert
If your packaging uses a custom insert, consider the insert and product together.
The insert may require additional space around or beneath the item. It may also contain multiple cavities for accessories or related products.
A better process is:
Measure product → Plan insert → Determine required internal space → Finalize box dimensions
This prevents a common problem where the outer box is finalized before anyone checks whether the insert fits properly.
For products that need organized internal support, the insert should be treated as part of the packaging structure rather than an accessory added at the end.
Internal vs. External Box Dimensions
One important detail when ordering corrugated packaging is understanding whether measurements refer to inside or outside dimensions.
Internal Dimensions
Internal dimensions describe the usable space inside the box.
These measurements are especially important when determining whether a product, insert, or cushioning system will fit.
External Dimensions
External dimensions describe the outside size of the finished box.
They can be affected by the thickness of the corrugated board and box construction.
For product-fit planning, internal dimensions are usually the more useful starting point. External dimensions become important when considering shipping, storage, pallet arrangement, or other logistical requirements.
Always confirm which measurement system your packaging supplier is using.
How to Measure Multiple Products for One Box
Multi-product packaging requires more planning than measuring each item separately.
Start by arranging the products in the position you want them to have inside the package.
Then measure the entire planned layout.
Consider:
- Space between individual products
- Dividers or inserts
- Product height differences
- Accessories
- Printed materials
- Protective cushioning
For example, a gift set containing three bottles may require individual compartments so the bottles do not move into each other.
The final box dimensions should be based on the complete packaging layout rather than the dimensions of the largest item alone.
Measuring Fragile Products
Fragile items need additional attention because a tight-fitting box without adequate protection may still expose the product to damage.
Products such as glassware, electronics, ceramics, bottles, and delicate components may require cushioning around multiple sides.
Start with the product dimensions, then determine which corrugated packaging materials and protective components will surround it.
The final internal dimensions should account for both.
Avoid assuming that simply choosing a larger box provides better protection. Too much uncontrolled empty space can allow the product to move inside the package.
The objective is a planned protective fit, not just extra room.
Don’t Make the Box Too Tight
Reducing empty space is useful, but the box should not be so tight that the product is difficult to pack or remove.
Small manufacturing variations, inserts, product wrapping, and other components can affect fit.
The package should provide enough usable space for efficient packing while still controlling unnecessary product movement.
This is another reason why product measurements should be considered together with the complete packaging design.
Why Right-Sizing Matters for Shipping
Box size affects more than appearance.
Shipping carriers may consider package dimensions as well as weight when calculating certain shipping charges. A box that is significantly larger than necessary can therefore create logistical disadvantages in addition to using more packaging material.
Right-sizing corrugated packaging aims to create a box that provides the required protection without unnecessary volume.
For businesses shipping many orders, even small improvements in package size can also affect storage space, packing operations, and pallet or warehouse efficiency.
The best box is not automatically the smallest possible box. It is the size that balances product fit, protection, packing efficiency, and shipping requirements.
Common Product Measurement Mistakes
Avoid these common problems when planning corrugated packaging.
Measuring Only the Product Body
Include caps, handles, pumps, connectors, and any other parts that increase the overall dimensions.
Forgetting About Inserts
If an insert will be used, include its required space before finalizing the box.
Adding Too Much Extra Space
A large amount of unused space can increase product movement and packaging volume.
Making the Fit Too Tight
Allow enough practical space for packing, protective materials, and product removal.
Ignoring Product Orientation
The same product can require different box dimensions depending on how it is positioned.
Confusing Internal and External Dimensions
Always confirm whether the dimensions being discussed represent usable internal space or the outside of the finished box.
What Information Should You Give Your Packaging Supplier?
Accurate product dimensions are a good start, but additional details can help a packaging supplier understand the complete project.
Provide information such as:
- Product length, width, and height
- Product weight
- Quantity of products per box
- Product orientation
- Fragility level
- Insert or divider requirements
- Accessories included
- Shipping method
- Desired box style
- Printing or branding requirements
Photos or samples can also be useful for products with unusual shapes.
Once these details are available, custom corrugated boxes can be developed around the actual product and its packaging requirements rather than relying on a generic box size.
Final Thoughts
Learning how to measure a product for a corrugated box starts with three basic dimensions, but accurate packaging requires more than recording length, width, and height.
Consider the product’s complete shape, orientation, protective materials, inserts, accessories, and shipping requirements before deciding on the final internal box size.
For multi-product or fragile packaging, plan the complete internal layout first.
The goal is a right-sized corrugated box that gives the product enough room for proper protection without creating unnecessary empty space.
Accurate measurements at the beginning can make the rest of the packaging design process much easier.


